
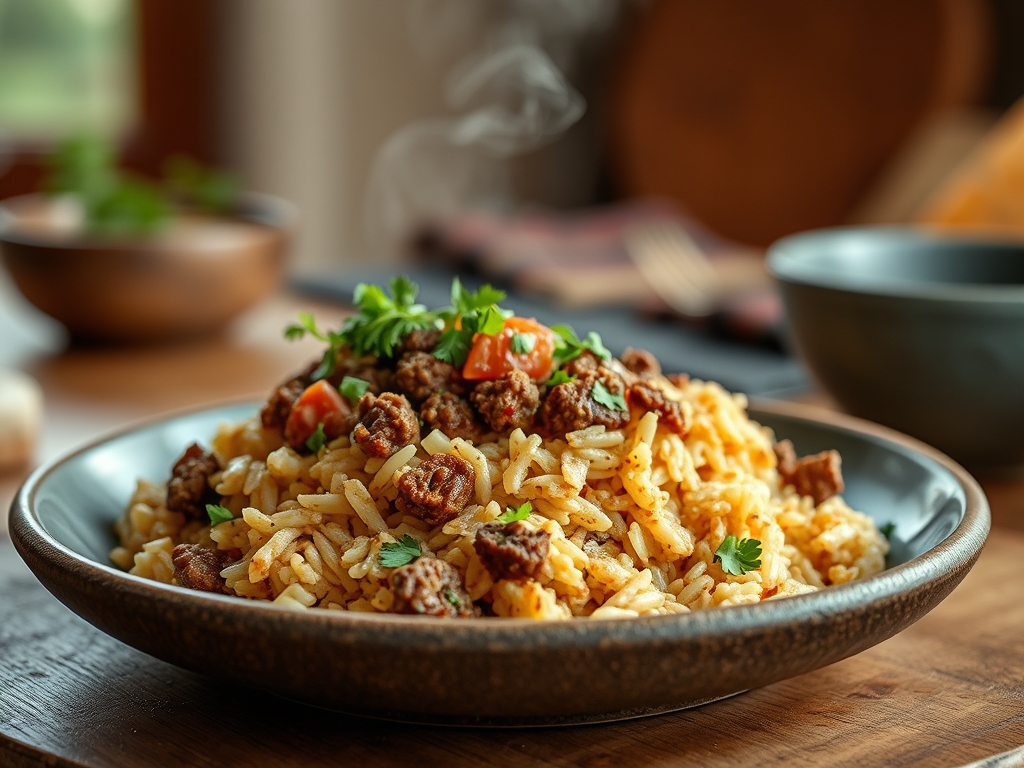
Picture the sizzle of a heavy-bottomed skillet meeting cold fat; it is the sound of a weeknight victory. When you master mexican rice and ground beef recipes, you are not just cooking dinner. You are orchestrating a complex chemical ballet of browning proteins and hydrating starches. The air fills with the piquant aroma of toasted cumin and the savory depth of rendered fat. It is a one-pan masterpiece that balances the acidity of tomatoes with the earthy richness of beef. This is the ultimate comfort food for the modern kitchen. It is fast, efficient, and deeply satisfying.
The magic lies in the contrast of textures. You want rice that is fluffy and distinct, not a gummy monolith. You want beef that is deeply caramelized, providing a savory counterpoint to the bright, zesty sauce. By understanding the science of the Maillard reaction and the mechanics of starch gelatinization, you can transform humble pantry staples into a restaurant-quality meal. Let us dive into the technical nuances that make these mexican rice and ground beef recipes stand out from the crowd. We will focus on heat management and ingredient layering to ensure every bite is a perfect equilibrium of spice and soul.
The Gathers:
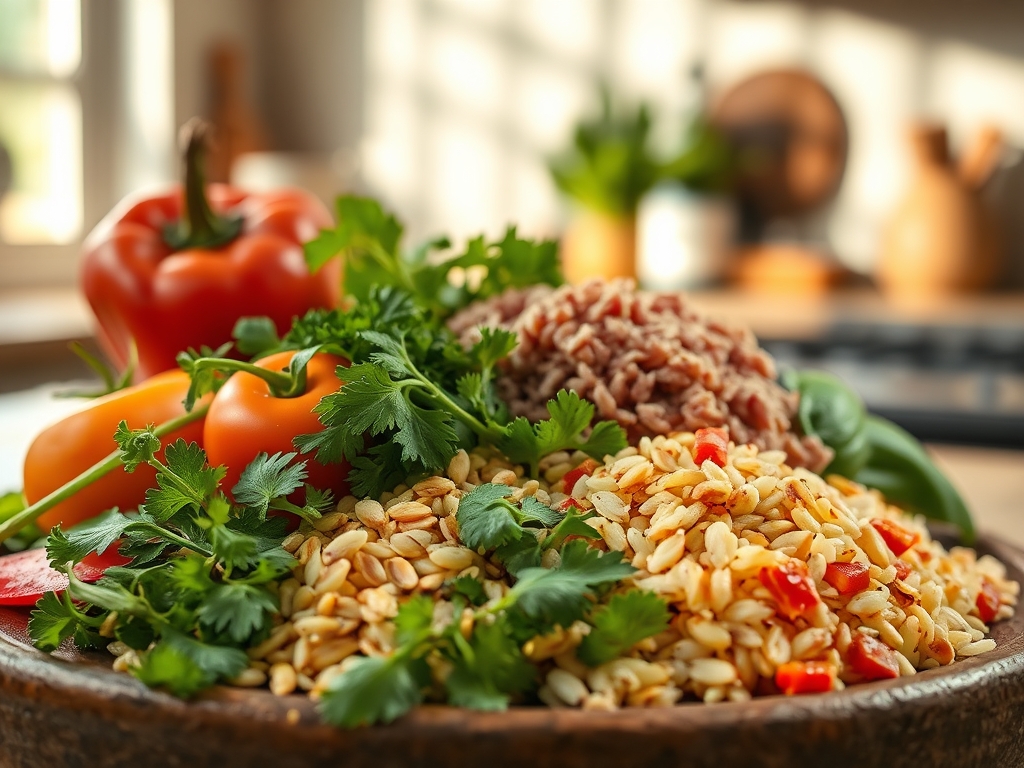
Every great dish begins with a meticulously organized mise-en-place. For these mexican rice and ground beef recipes, we focus on high-quality aromatics and specific fat ratios. You will need one pound of 80/20 ground chuck; the 20 percent fat content is vital for a viscous mouthfeel and flavor transport. Use a digital scale to measure out 1.5 cups of long-grain white rice. Long-grain varieties contain more amylose, which ensures the grains stay separate and do not clump during the simmering process.
Your aromatic base consists of one large white onion, finely diced with a sharp chef knife, and four cloves of garlic. Do not use a press; instead, use a microplane to create a garlic paste that will dissolve seamlessly into the sauce. You will also need 14.5 ounces of fire-roasted crushed tomatoes, two cups of low-sodium beef stock, and a spice blend of smoked paprika, ground cumin, and dried oregano.
Smart Substitutions:
If you are looking to lighten the profile, swap the beef for ground turkey, but add a teaspoon of Worcestershire sauce to mimic the umami depth of red meat. For the rice, you can use cauliflower rice for a low-carb alternative; however, you must reduce the liquid volume by 80 percent since cruciferous vegetables release significant moisture when heated. If you lack beef stock, a high-quality bouillon base mixed with filtered water provides a more consistent salinity than canned broths.
The Clock
Efficiency in the kitchen is about the "Chef's Flow." This refers to the overlapping of tasks to minimize downtime. Your total active prep time should be exactly 12 minutes. This includes dicing your aromatics and measuring your spices. The cooking phase takes approximately 25 minutes, followed by a mandatory 5-minute rest.
The flow works like this: while your skillet preheats, you dice the onion. As the beef renders, you measure the rice and spices. While the rice simmers, you clean your station with a bench scraper and prepare your garnishes. This ensures that by the time the timer beeps, your kitchen is tidy and your palate is ready. Total time from pantry to plate is under 45 minutes, making this the gold standard for high-density nutrition on a schedule.
The Masterclass

1. Render and Brown the Protein
Place your heavy-bottomed skillet over medium-high heat. Add the ground beef, breaking it into large chunks with a wooden spoon or a specialized meat masher. Allow the meat to sit undisturbed for three minutes to initiate the Maillard reaction. This chemical reaction between amino acids and reducing sugars creates the complex, savory crust that defines professional-grade beef dishes.
Pro Tip: This is called thermal carryover prevention. By browning the meat deeply but leaving the interior slightly underdone before adding liquids, you ensure the beef remains tender rather than rubbery after the final simmer.
2. Sauté the Aromatics
Once the beef is browned, use a slotted spoon to remove the meat, leaving the rendered fat in the pan. Toss in your onions. Sauté until translucent, using the moisture from the onions to deglaze the bottom of the pan. This process lifts the fond, those delicious caramelized bits stuck to the skillet, and integrates them into the base of your sauce.
Pro Tip: Onions contain sulfur compounds that mellow and sweeten when heated. This enzymatic browning creates a flavor foundation that balances the acidity of the tomatoes we will add later.
3. Toast the Rice
Add the dry rice directly into the hot fat with the onions. Stir constantly for two minutes until the edges of the rice grains become translucent and the centers look opaque white. This step is crucial for mexican rice and ground beef recipes because it coats each grain in fat, preventing excess starch from leaching out and making the dish mushy.
Pro Tip: Toasting the rice triggers a secondary Maillard reaction in the grain's proteins, adding a nutty, toasted aroma that raw boiling simply cannot achieve.
4. Infuse the Spices and Garlic
Add your garlic paste and spice blend to the center of the pan. Stir for only 30 to 45 seconds. You want to "bloom" the spices in the hot oil, which releases fat-soluble flavor compounds that are otherwise trapped in the dried herbs.
Pro Tip: Garlic has a high sugar content and a low burn point. Adding it last in the aromatic phase prevents the bitter flavors associated with over-caramelization.
5. Liquid Integration and Simmer
Pour in the crushed tomatoes and beef stock. Return the browned beef to the skillet. Bring the mixture to a rapid boil, then immediately reduce the heat to the lowest setting. Cover the skillet with a tight-fitting lid to trap the steam.
Pro Tip: This is the gelatinization phase. The rice granules absorb the liquid, causing the starch molecules to swell and soften. A tight seal is required to maintain the specific water-to-rice ratio needed for perfect hydration.
6. The Mandatory Rest
After 18 minutes, remove the skillet from the heat but do not lift the lid. Let it sit for five minutes. This allows the moisture to redistribute evenly throughout the pan, ensuring the bottom layer of rice is just as fluffy as the top.
Pro Tip: Resting the dish allows the steam to settle back into the grains. If you fluff the rice too early, you break the delicate starch structures, resulting in a wet, sticky texture.
7. Aerate and Garnish
Use a fork or a wide spatula to gently lift and fold the rice. This is called aeration. It separates the grains and allows excess steam to escape. Top with fresh cilantro, a squeeze of lime juice, and perhaps some crumbled cotija cheese.
Pro Tip: The citric acid in the lime juice acts as a flavor enhancer, cutting through the richness of the beef fat and brightening the earthy notes of the cumin.
The Deep Dive
From a macro nutrition perspective, this dish is a powerhouse. A standard serving provides approximately 35 grams of protein, 40 grams of complex carbohydrates, and 15 grams of healthy fats. It is a balanced fuel source for both brain and body.
Dietary Swaps:
For a vegan version, replace the beef with a mix of black beans and walnuts; the walnuts provide the necessary fat and texture. Use vegetable stock and add a dash of liquid smoke for depth. For a Keto-friendly version, replace the rice with riced broccoli and reduce the stock to half a cup. For Gluten-Free needs, simply ensure your beef stock is certified, as some brands use wheat-based thickeners.
The Fix-It:
- Rice is Crunchy: Your heat was likely too high, evaporating the liquid before the rice cooked. Add 1/4 cup of hot stock, cover tightly, and simmer for five more minutes.
- Dish is Greasy: You likely used beef with too high a fat content without draining. Stir in a tablespoon of lime juice or apple cider vinegar; the acid will emulsify the fat and brighten the palate.
- Flavor is Flat: This usually indicates a lack of salt or acid. Add a pinch of sea salt and a heavy squeeze of lime. Salt unlocks the volatile aromas in the spices.
Meal Prep Science:
When reheating, the rice often undergoes retrogradation, where the starches crystallize and become hard. To fix this, add a teaspoon of water per serving and cover with a damp paper towel before microwaving. This creates a mini-steam chamber that re-hydrates the starch molecules to "day-one" quality.
The Wrap-Up
Mastering mexican rice and ground beef recipes is about more than just following a list of steps; it is about understanding how heat and ingredients interact to create something greater than the sum of its parts. By browning your beef, toasting your rice, and blooming your spices, you elevate a simple skillet meal into a culinary event. This dish is forgiving, flavorful, and incredibly efficient. Now, grab your favorite skillet and start rendering; your best dinner yet is only 30 minutes away!
The Kitchen Table
Can I use brown rice for this recipe?
Yes, but you must increase the liquid by half a cup and the simmering time to 45 minutes. Brown rice has an outer bran layer that requires more hydration and heat to soften effectively.
How do I prevent the rice from sticking to the pan?
Ensure you toast the rice in fat before adding liquid. This creates a hydrophobic barrier on the grain. Also, use a heavy-bottomed skillet to ensure even heat distribution and prevent localized hot spots that cause burning.
What is the best way to store leftovers?
Store in an airtight container in the refrigerator for up to four days. For the best texture, cool the dish quickly by spreading it on a baking sheet before transitioning it to a storage container.
Can I freeze mexican rice and ground beef?
Absolutely. This dish freezes beautifully for up to three months. Thaw it overnight in the refrigerator before reheating with a splash of water to restore the moisture balance of the rice grains.